Client invoices
LBS Suite gathers all invoices ready for invoicing in your accounting view widgets. LBS Suite sorts them by category:
- Orders to be invoiced: regular invoices
- Orders to be invoiced (monthly): for clients asking for one invoice a month
- Orders to be invoiced (multiple): for clients asking for multiple invoices for the same project
Client configuration
To correctly use the invoicing widgets, configure the client’s sites and contacts records.
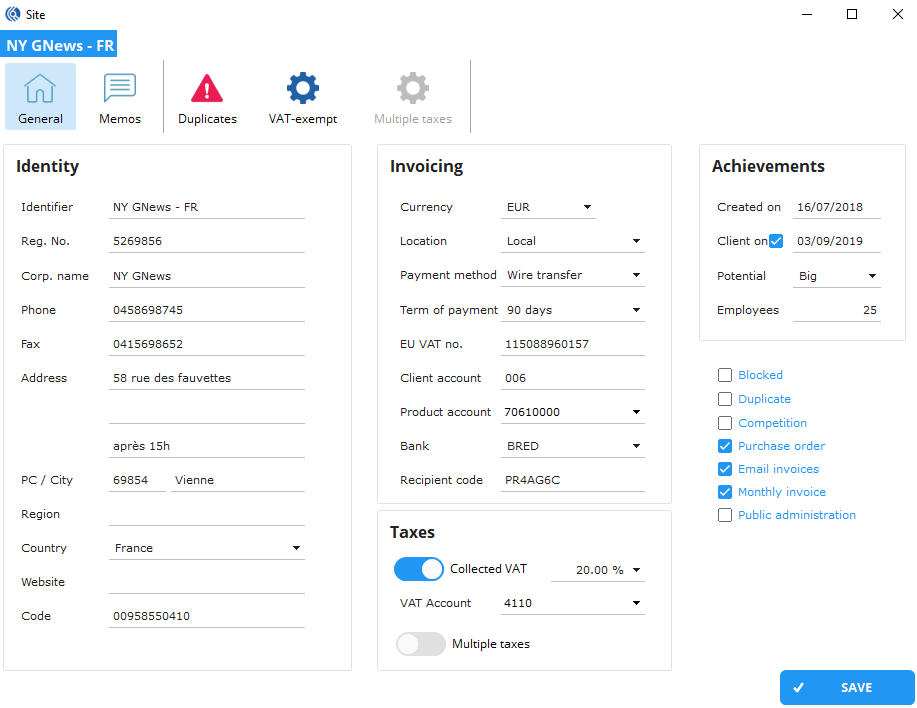
Client site configuration
- Open the site of the client
- Configure the “Invoicing” and “Taxes” inserts with client data
Client contact configuration
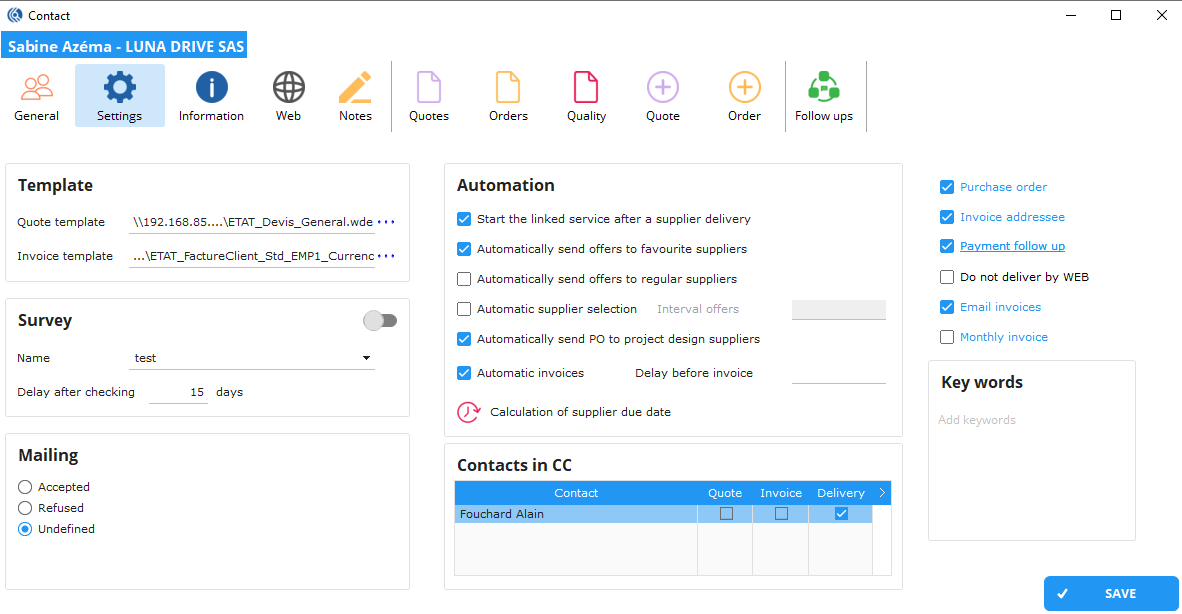
- Open the contact
- In the “General” tab, In the “Invoicing” insert:
- In “Site”, select the site that will be invoiced for the orders of this contact
- In “Addressee”, select the contact that will be invoiced for the orders of this contact
NB: Per default, the invoice will be sent to the site and to the contact themselves if “Invoice addressee” is ticked in the contact record.
- Tick “Monthly invoice” if the client request one invoice per month (this setting is also available in contact records, in case it is applicable to one client contact)

- In the “Settings” tab, tick “Invoice addressee” if the contact can be the addressee of the client invoices.
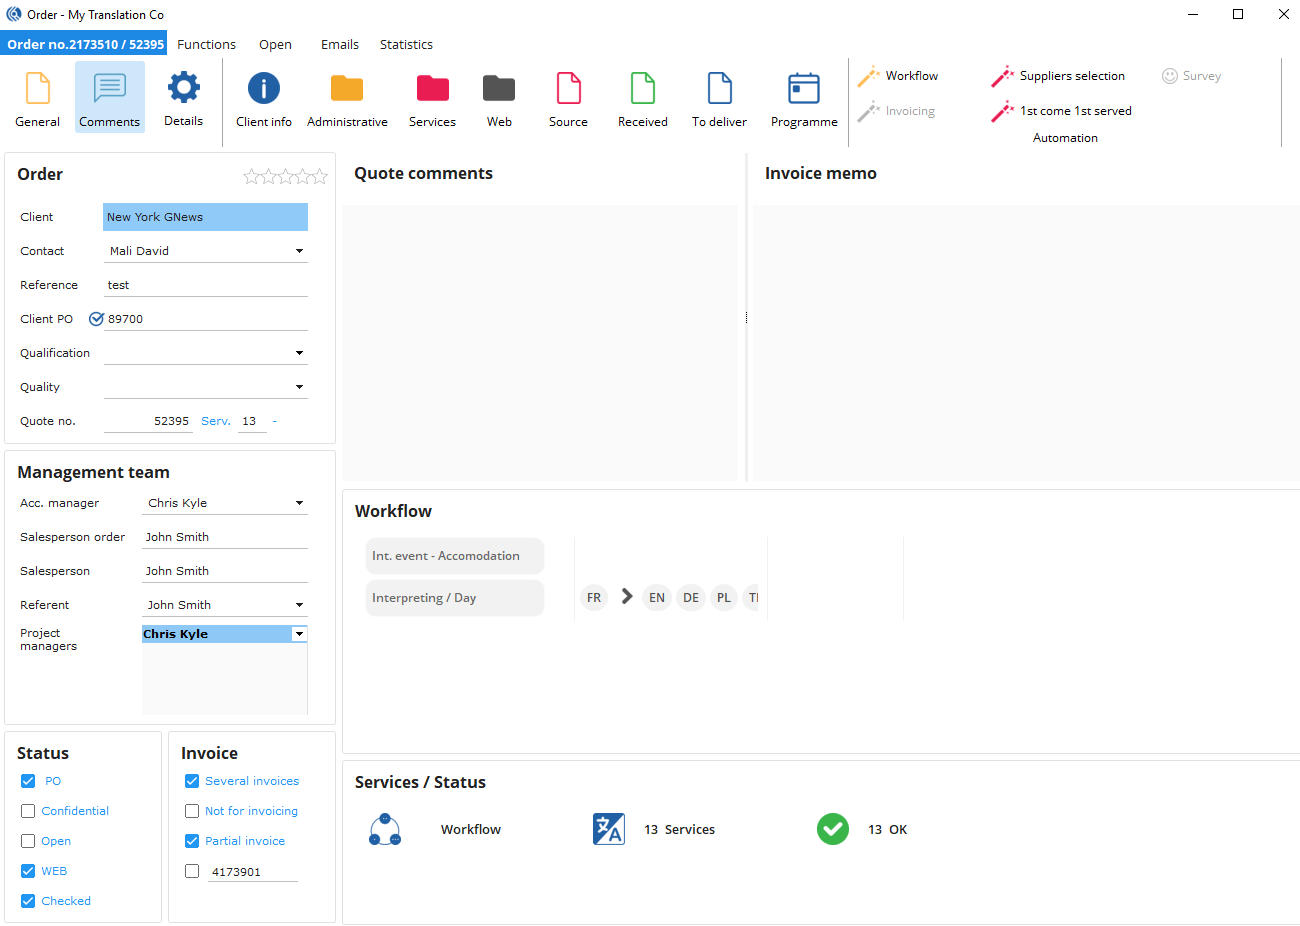
Order settings (only for multiple invoices)
- Tick “several invoices” in the bottom “Invoice” insert
- Click on the “Comment” button in the ribbon menu
- Type comments in the invoice memo insert (i.e. what the client said when he asked for several invoices). NB: This memo will be seen when creating the invoices.
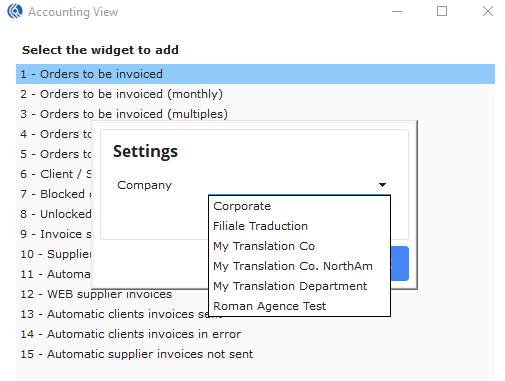
Invoicing widgets (accounting view)
Widgets configuration
In your Accounting view, in the “Widgets” tab:
-
Click on the “New” button of the ribbon menu

- For regular invoices: Select the widget “1 - orders to be invoiced”.
- For monthly invoices: Select the widget “2 - Orders to be invoiced (monthly)”.
- For multiple invoices: Select the widget “3 – Orders to be invoiced (multiples)”.
-
Double-click on it and choose the company this widget will be for.
-
Click ‘OK’ to save changes.
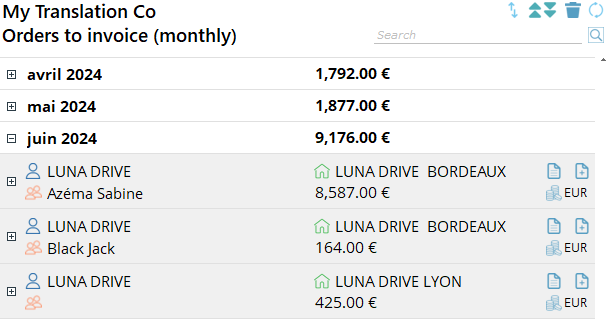
Description of the widgets
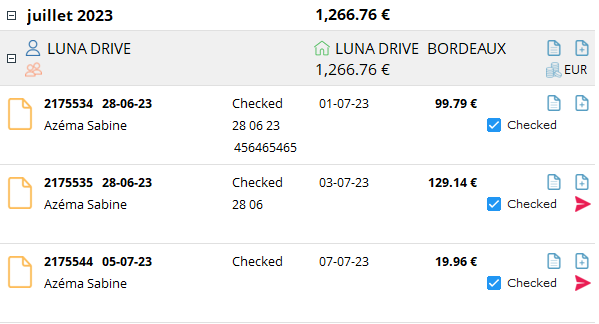
Widget layout:
Orders are grouped by month, client and invoice addressee.
In front of the month is displayed the total amount to be invoiced in the month.
Below the client site name is displayed the total amount to be invoiced in the month per invoice addressee.
In the upper corner of order lines is displayed the invoiceable amount of each order.
Icon meaning and functionalities:
![]() Expand/hide details
Expand/hide details
![]() Blue Client icon: click and open the client record
Blue Client icon: click and open the client record
![]() Orange Contact icon: no other functionality
Orange Contact icon: no other functionality
![]() Green Site icon: no other functionality
Green Site icon: no other functionality
![]() Blue existing invoice icon: Click to add this/these order(s) to an existing invoice. (Cf. document “Add orders to an existing invoice”)
Blue existing invoice icon: Click to add this/these order(s) to an existing invoice. (Cf. document “Add orders to an existing invoice”)
![]() Blue new invoice icon: Click to create a new invoice for this/these order(s)
Blue new invoice icon: Click to create a new invoice for this/these order(s)
![]() Bleu coins icon + currency name: Show the currency of the order/invoice
Bleu coins icon + currency name: Show the currency of the order/invoice
![]() Red arrow icon: Click to send a PO reminder to the client (only shown when PO is required and missing).
Red arrow icon: Click to send a PO reminder to the client (only shown when PO is required and missing).
![]() Checked icon: Shows that the order is fully completed and checked.
Checked icon: Shows that the order is fully completed and checked.
Invoicing
All orders in this widget are ready to be invoiced.
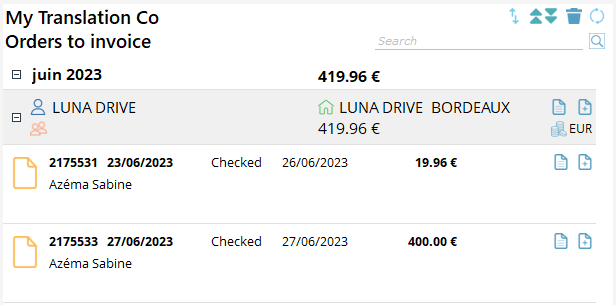
Regular invoices
- Click on the Blue new invoice icon
 at the end of the line at the contact level to create a single invoice for all orders that are completed and checked.
NB: Click on the icon at the order level to invoice the orders one by one.
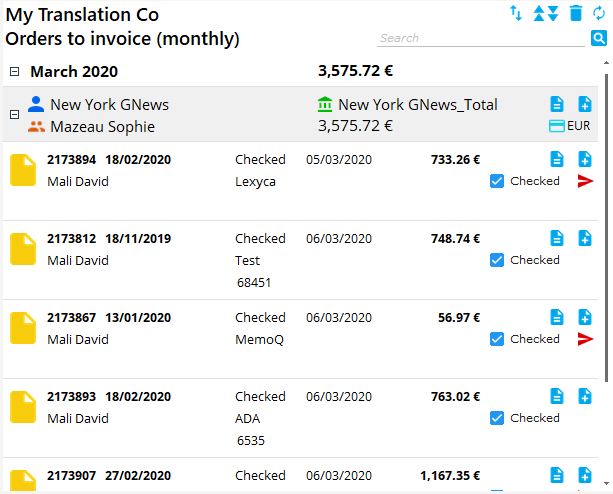
Monthly invoices
Invoice several orders once a month per invoice addressee.
- Click on the Blue new invoice icon at the end of the line at the contact level to create a single invoice for all orders that are completed and checked.
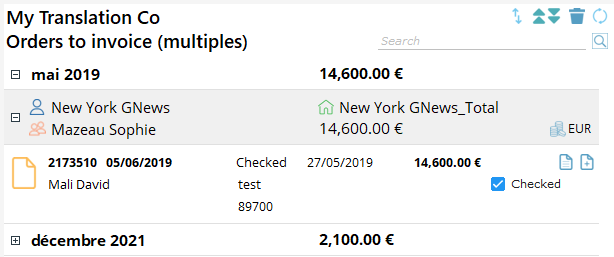
Multiple invoices
You will find in this widget all orders that have been ticked “Several invoices” by the PMs.
- Click on the Blue new invoice icon at the end of the line at the contact level to create a single invoice for all orders that are completed and checked.
Invoice creation
- The window below appears:
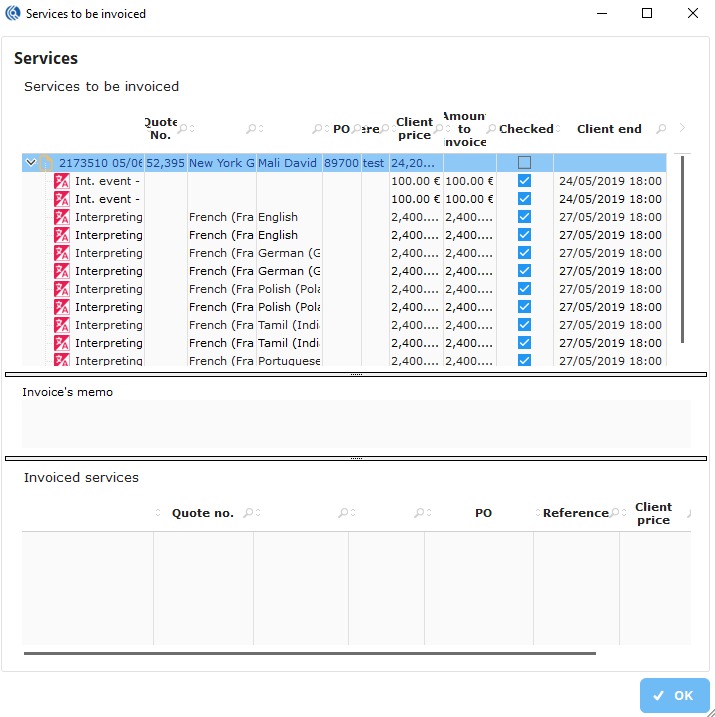
- The “Services to be invoiced” table: Shows all the invoiceable services in the invoiced orders
- The “invoice’s memo”: Shows the memo for invoicing the order
- “The invoiced services”: Shows the services selected for the invoice
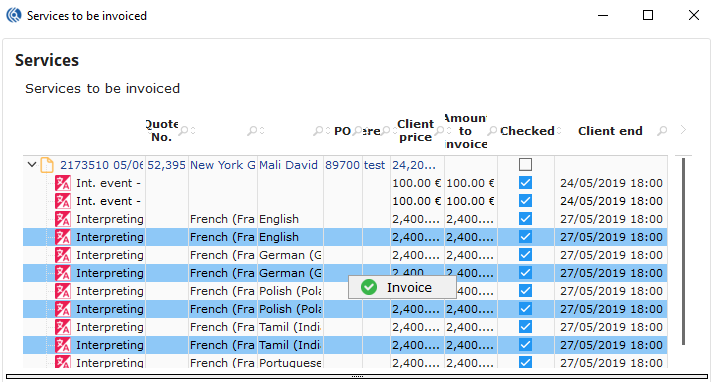
- Double-click on a service line or select several services and right-click and select “invoice”, to transfer the service(s) from “Services to be invoiced” to “Invoiced services”
NB: Double-click on a service in the table “Invoiced services” to send it back to “Services to be invoiced” if needed.
- Click on the ’OK’ button on the bottom right corner to save the selection.
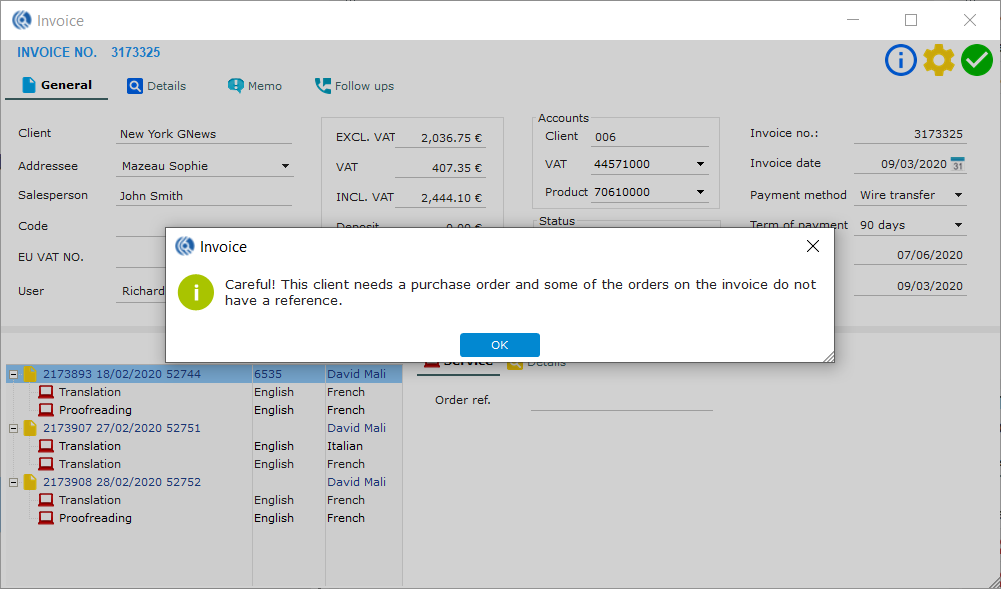
NB: Your invoice is now created with all the information from the client record and orders. If the client requires a PO, and it has not been added yet, a message (see below) will appear until you add one.
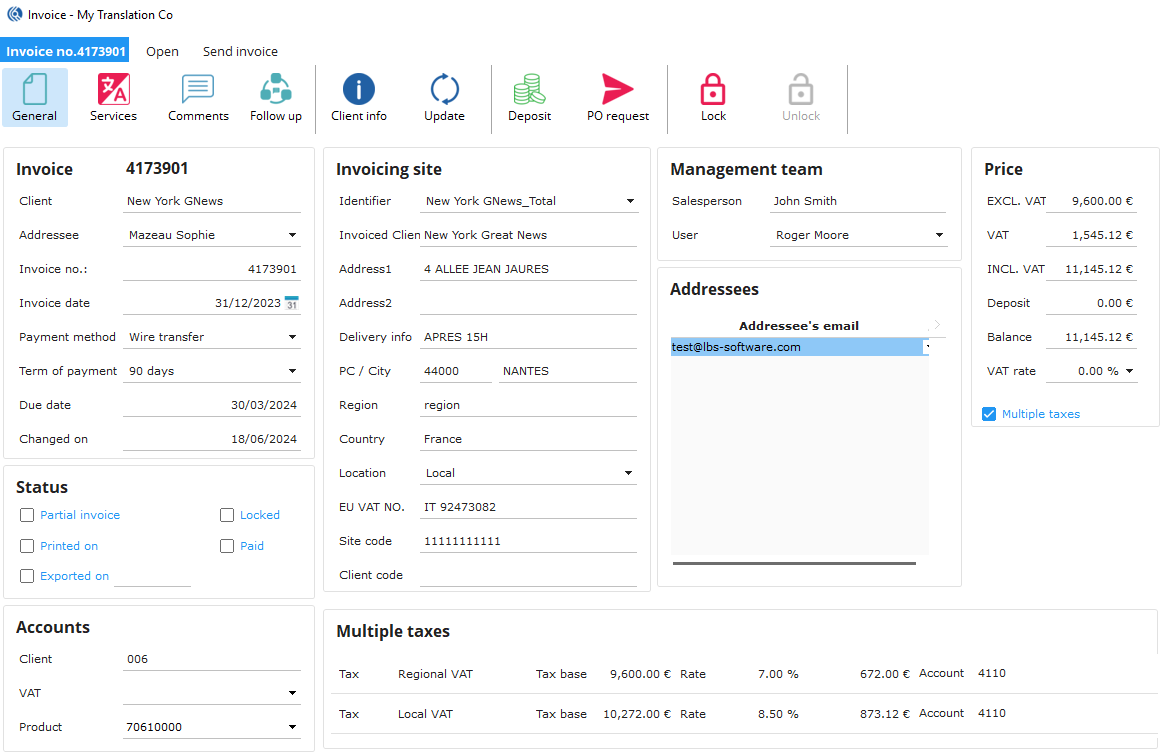
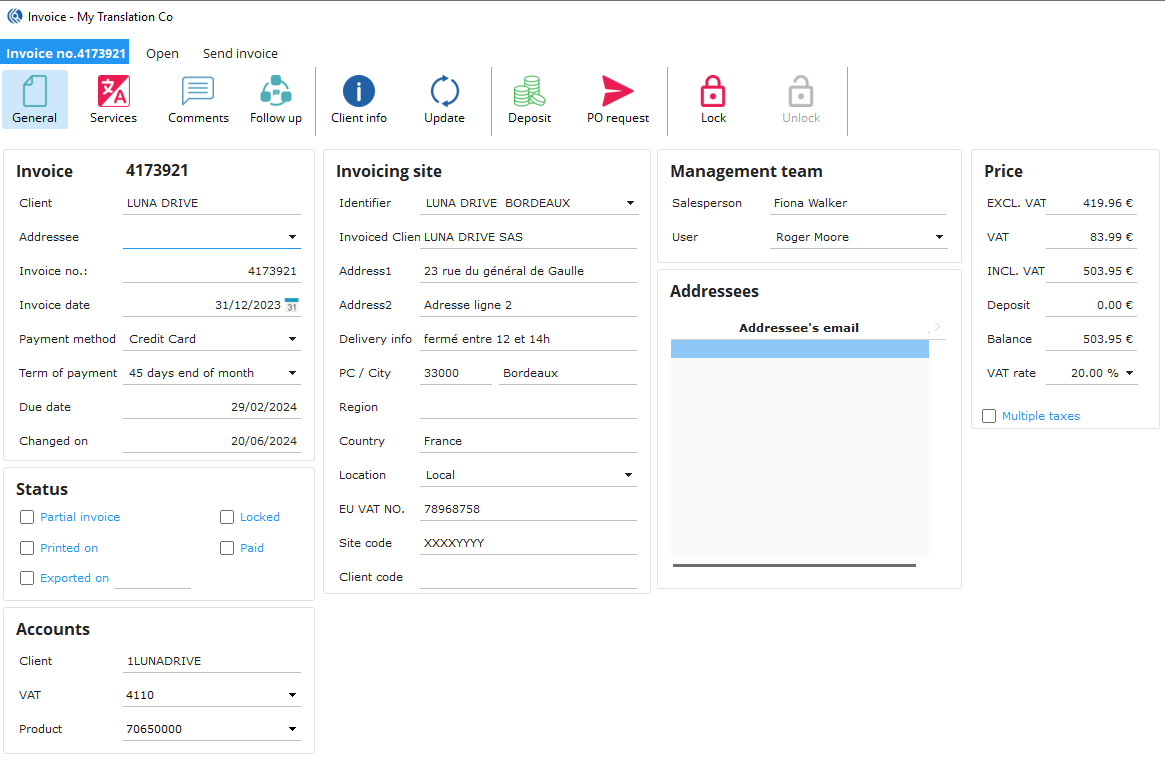
- The invoice opens
- The following fields are mandatory. They are filled automatically:
- Invoice date
- Payment Method
- Term of payment
- Client account
- VAT account
- Product account
- The following fields are mandatory. They are filled automatically:
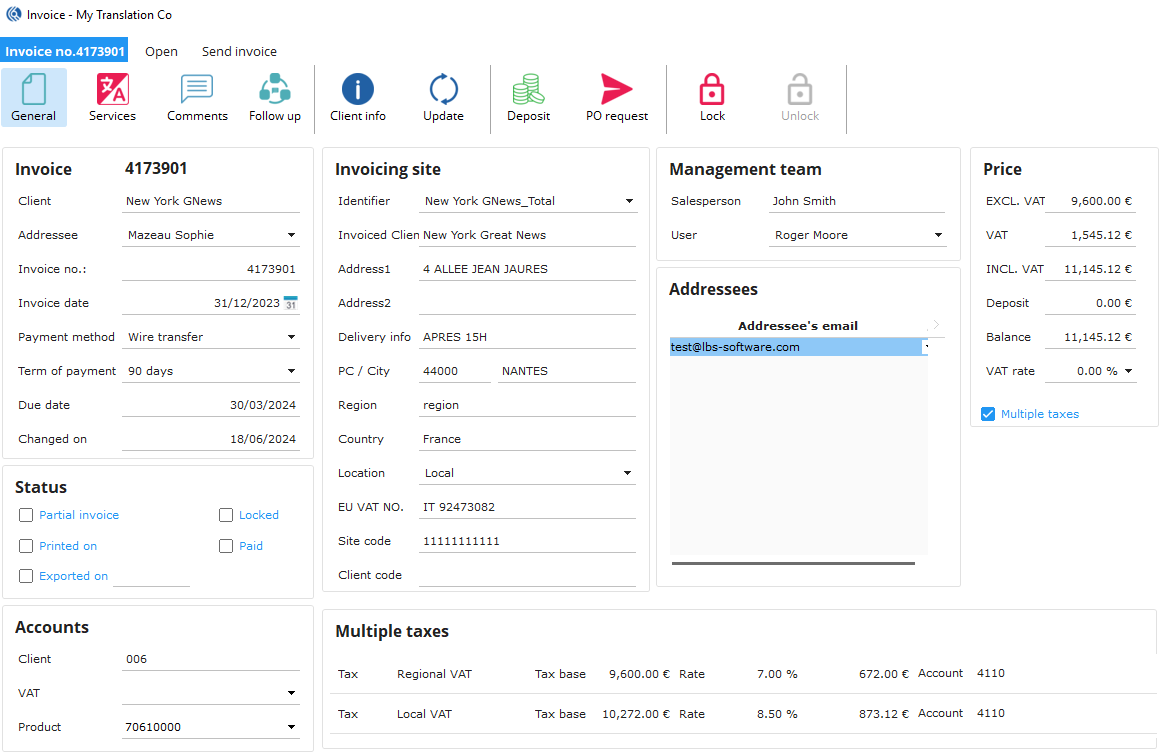
NB: If one of these fields is not filled automatically, the client record needs to be updated. Once it is done, click on the “Update” button in the ribbon menu to apply the changes.
NB2: You can manually change some of the data in the “Invoice” and “Invoicing site” inserts if needed. You can also choose multiple addressees in the “Addressees” insert if needed.
- Click on the “Send Invoice” menu to start editing and sending the invoice. In the ribbon menu:
- Click on “PDF by email” to send the invoice via email (see step 7 further below how to generate the pdf
- Click on “PDF to WEB” to send the invoice via the client portal (skip step 7, LBS will choose the default template set in the contact record)
- (In the case of sending the invoice by email) The window “Send an email” opens
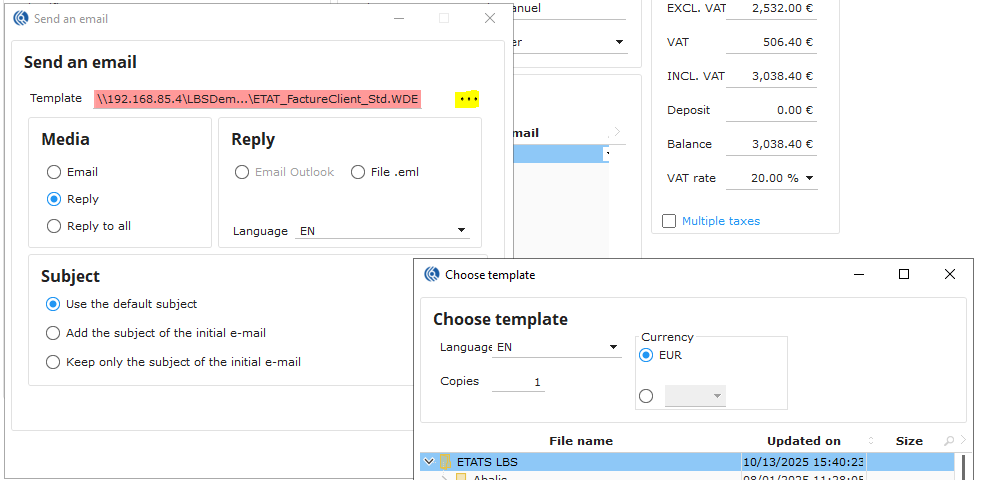
- Click on the three blue dots icon to select an invoice template
- The “Choose template” window opens
- Select the language (by default the language of the contact)
- Choose the currency (by default the company currency)
- Select a template in the list below
- In “Media”, select between:
- Email: New email
- Reply: Reply to a specific email
- Reply to all: Reply to a specific email with all the contacts of the selected email
- In “Subject”, select between:
- Use the default subject: The default subject is set in the invoice email template
- Add the subject of the initial e-mail: Adds the subject of the initial e-mail to the default subject
- Keep only the subject of the initial e-mail: Ignores the default subject to only keep the subject of the initial e-mail
- Click on ok to generate the e-mail and send
- In the main invoice menu, click on “Lock” to validate and lock the invoice.